In between taking a brush to my High Elves and giving them a few test rides with the Age of Sigmar ruleset I've been working on the buildings needed for the Grudge of Drong campaign. This campaign is (I just read) notable for being the last to feature cardboard buildings to use with the scenario's. But why use cardboard when you can scratch build. Over the past few weeks I've been learning how not to use my new
polystyrene cutting tools by attempting Das Bierlager (my guide to building the buildings is in German, it enhances the appeal of Dwarves immeasurably in my opinion). Here's a quick list of things I've learned the hard way about polystyrene cutting:
- Make sure the angle between two walls is 90 degrees before cutting the lot, 100+ degree angles lead to very strange geometry (unusable buildings unless you're a great old one).
- Put the texture on the walls before cutting the 90 degree corners, <1 mm polystyrene is not known as 'the strongest material in the world' for a reason.
- Don't glue with PVA glue, it dries way too slow, use transparant 'everything' glue (just as with foamboard).
- Don't push cocktail sticks in neatly cut polystyrene buildings, it makes the walls crack.
- Check your supply of 1mm cardboard, you may have just used all of it to make tiles for Armageddon buildings...
So there was a bit of a learning curve here. In the end my first building is standing (almost fully) primed and ready for paint.
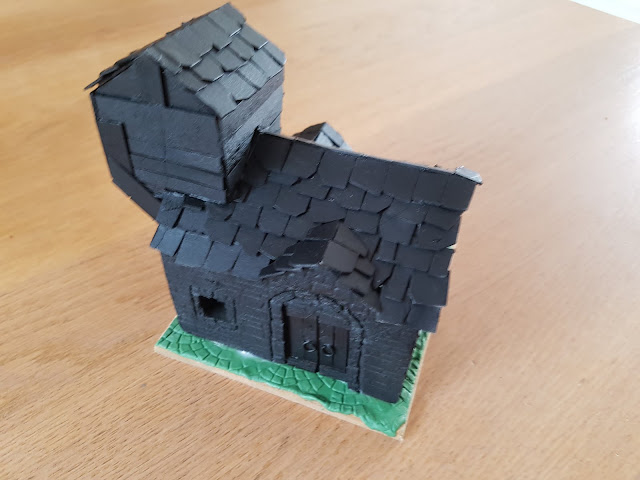 |
| Front side of Das Bierlager, I wonder what the top floor is used for... |
I diverted from the cardboard GW plans where needed (usually because my talent when it comes to sculpting intricate stonework and pretty details is very limited).
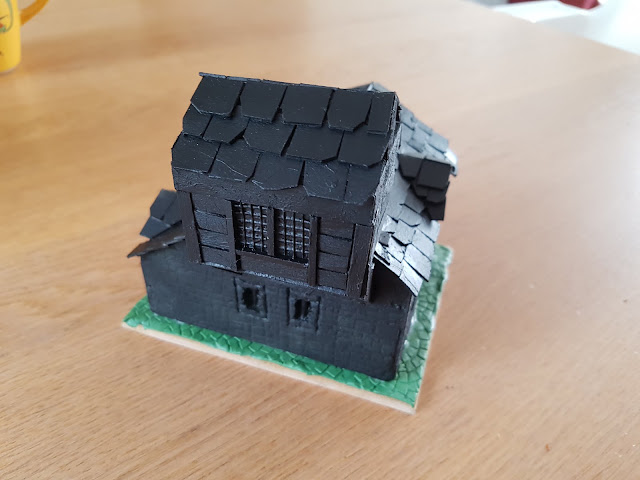 |
| Perhaps the Dwarf in charge of the hall sleeps here, but what self respecting Dwarf would deign to sleep high above ground when there is a cellar available. |
The windows on the wooden top floor of the building use two bits of the same Ikea carpet underlay as my Armageddon terrain tiles use. I'm actually almost out and should visit this Swedish Warhammer/AoS terrain store sometime soon.
 |
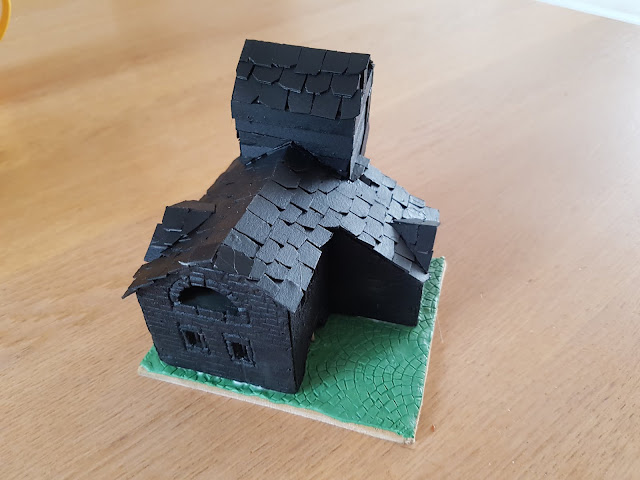
| Top left, proof of the existence of said cellar. |
The bars in the bottom right window where added just before gluing the building to the base. I almost forgot this detail.
 |
| Considering a huge bunch of fat, bearded guys drinking beer and eating garlic sausage all day, having a big window shaped hole in the top of a beer hall might actually do the air quality a great deal of good. |
And the fourth side of the building. I did forget to put something in the half round top window, I'm going to go for pretending that was the plan all along... Not yet pictured are a few more plastic
Renedra barrels I will add later.
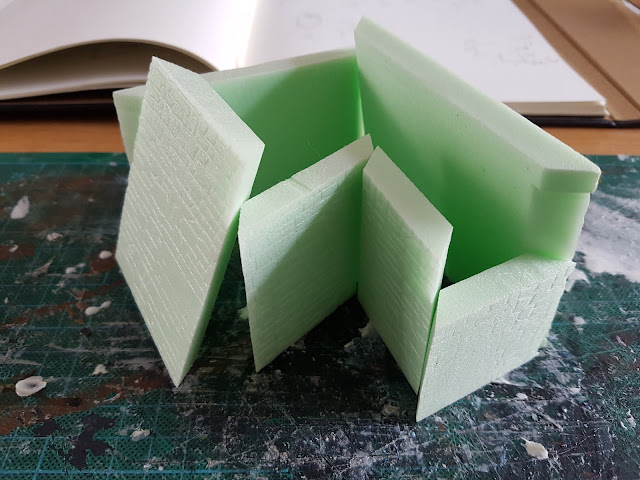 |
| Walls for Das Bierlager, the final cut (that actually fit). |
Here is a shot of the walls of the building. I textured them using a
Greenstuff World textured rolling pin the polystyrene was cut using a hot-wire cutter in combination with my
Shifting Lands tools. I cut the angles for the roofing in by hand using a metal ruler and a hobby knife.
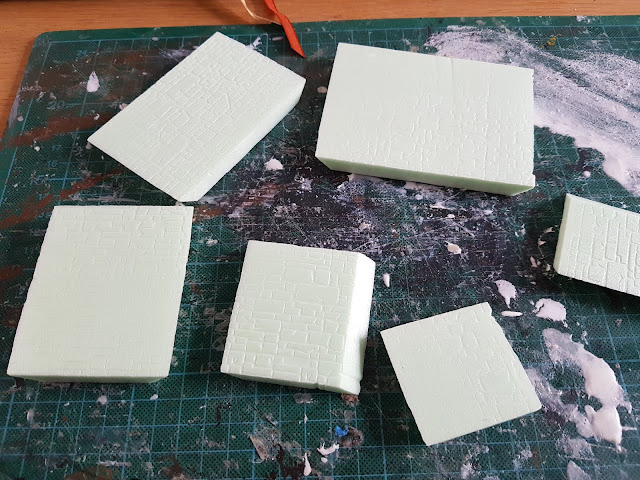 |
| Ready to cut some angles in (and also to show of that I've not quite mastered the art of pressing a texture into polystyrene. |
For the final assembly I used transparant hobby glue and a pins to stick the sides together. The roof was made using a leftover package for Earl Grey tea (as I was out of cardboard). This I followed up with a trip to the hobby store to replenish my cardboard supply. In all my enthusiasm about finally assembling my first building (after multiple failed tries) I forgot to take some in between photo's.
 |
| Adding shingles is a great test of ones sanity. Low quality television playing in the background is a must. |
The roof shingles where individually cut. Most people use strips to put them on, but I like the effect of single tiles slightly better. It gives me chance to space them a bit more irregularly. I do cut my shingles from strips before separation (it helps me hold on to what remains of my sanity while producing them).
While I was busy slapping myself on the back for a job almost completed I suddenly remembered I had to make a top floor for this building. I decided on cardboard and in my rush to create something suitable forgot all the basic rules of working with cardboard (leave a strip for glueing and try to make the entire shape out of one piece that folds together). Luckily I'm rather used to my own foolish mistakes.
 |
| Adding the top floor while forgetting all the basics about working with cardboard. |
I just pinned the seperate sides to a leftover bit of polystyrene cut to size. Next I removed redundant roof tiles and stuck the top on the bottom building.
 |
| Not shown: needles holding the top floor in place. |
After this I added a cardboard roof followed by tiles and dressed the entire top floor in coffee stirrers and some thicker strips of wood. This is where the carpet underlay came in to play as well.
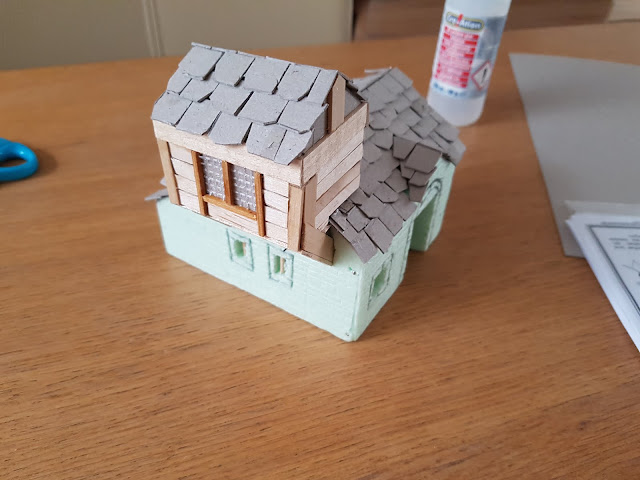 |
| Dressing it up tends to work wonders on making it look slightly more believable. |
And here is a few from the other side of the building.
 |
| I later added a door, as with many other parts of this project, I forgot to take pictures. |
I added a door (cardboard, wood and folded paper clip for door handles) and followed up (after allowing some time to dry) by airbrushing black Vallejo primer on the inside of the building. Then I started on the base. I always use 3mm MDF for my terrain bases. Assuming you don't get it too wet it doesn't warp, is nice and solid and (with power tools is very easy to cut to shape and sand down). As I had the texture roller available anyway and the size wasn't too monstrous I decided to use some greenstuff to make a cobblestone base.
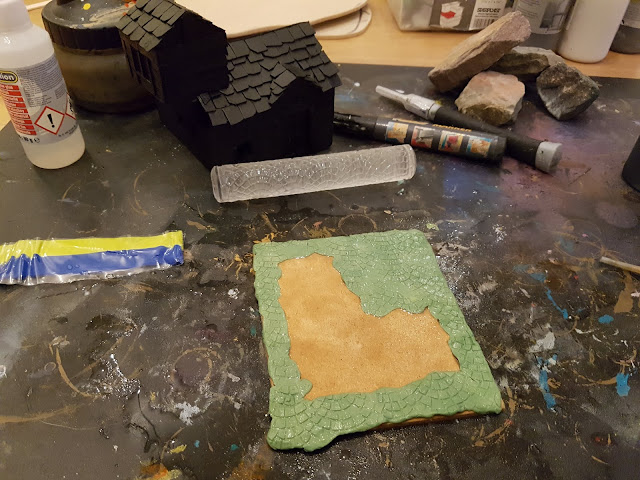 |
| A bit decadent: using green stuff to cover a terrain base. |
I learned how not to do that in a few ways before i had the above result and decided it was good enough. Excess greenstuff was carefully removed from the sides and I glued the building in place without waiting for it to cure. And here is where I ended up (and started this blog post).
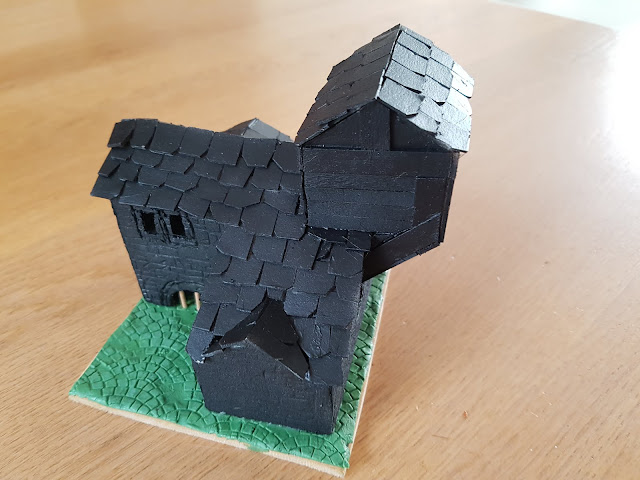 |
| The original building had a back door here. I liked the look of a wall better. I also suspect dwarves would have a back door in the basement. |
Next up adding a bit more primer and giving this building a splash of paint. In the meantime I've also started on the abandoned mine shafts needed for mission one. I've been pondering the look and feel of these for a while and finally decided just to start gluing materials to a base to see if my chaotic plans have some basis in reality. Here is a WIP shot of that project.
 |
| The start of two abandoned mine shafts. I'm already tallying up the first mistakes I made on this project, but I still suspect it will look ok when finished. |
Expect a long rambling story about these mine shafts soon, also some words on the Great Eagles that arrived (and are in the process of being painted) and a very special project that has something to do with a Jadeberry orchard and the ruins of a burned down farm...


No comments:
Post a Comment